02 Jan

Let’s see how to move your website to Shopify in some easy steps. Shopify is the most recommended E-Commerce platform. If you are already on some other E-Commerce platform and want to migrate, this guide will help you to transfer your store to Shopify in easy step.
In addition, Shopify is one of the most popular E-Commerce platform amongst all. It was built for startups to grow. Shopify is affordable and have three plans which vary in features.
Moreover, Shopify also offers 14 days free trail. It has many attractive themes that can be customized according to your needs.
Furthermore, Shopify have 24/7 support by email, live chat and phone. Web hosting is also taken care by Shopify which makes it more easy to use.
Shopify Migration :
Your reason to migrate your store to Shopify could be any. Maybe your website is not mobile responsive or maybe it’s not performing well as you thought it will be. This migration task is actually not as hard as it seems like.
It’s quite simple and can be done in easy steps provided by Shopify.
STEP 1: Configure Your Basic Administrative Settings:
Before you start anything, make sure to do basics like reviewing Shopify’s E-Commerce migration considerations. This include implementing URL redirects and removing specific protocols such as HTTP and HTTPS to make sure all your store assets are accessible.
Also It is important to complete your soon to be Shopify store’s initial setup. This includes:
- A general checklist that covers everything from organizing your store to promoting it
- Another checklist for setting up that deals with set-up, management and preparing to launch
STEP 2: Build Your New Shopify Website :
In this step don’t worry about your new store conflicting with your old store. Lock your new Shopify store with a password so no one will be able to see your store until its ready to launch. You can control your store once it’s accessible by public.
For your new Shopify store you will be needing Shopify’s subdomain like this: company.myshopify.com. This mean your new store will not conflict with your old store. Therefore, find a temporary subdomain.
Then pick a theme. From there you’ll load your products, build out your pages (About Us and the Homepage), and set up payments. You’ll need to add the elements to the homepage yourself. The benefits of Shopify extremely outweigh this one-time transfer.
Transfer Your Store To Shopify From WooCommerce :
If you are transferring from WooCommerce. Shopify have a process that should allow you to import the bulk of your product info into Shopify.
Moreover, when you create your Shopify store, Shopify will ask you if you are transferring stores and which platform you’re transferring from. If you select WooCommerce, you’ll see an import option in your store dashboard as soon as your store is created.
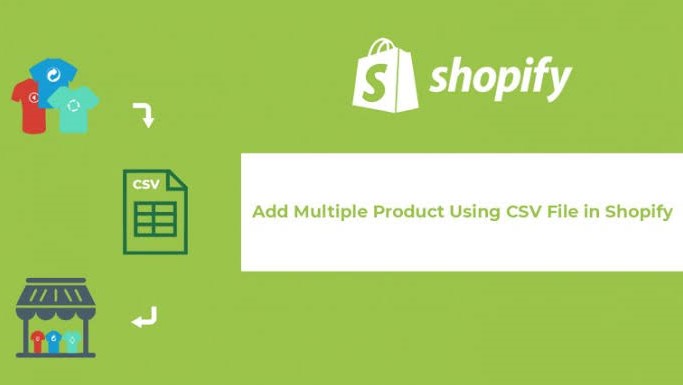
Importing products and customers to Shopify with a CSV:
Whether you are moving your products from WooCommerce or any other platform, you can import your products and customers from a CSV file. Whereas, you cannot import your order history unless you have Shopify Plus.
To import your products to your new Shopify store, you’ll go to Products in the admin panel. Near the top there is import option.
Another option is to use migration app which is available at Shopify App Store. Cart2Cart is one of them, its price is based on how many products you want to import.
Moreover, Shopify also have an option to hire a store expert through its Services Marketplace to help with the transfer.
Transferring Your Store With Shopify Plus:
If you are transferring your store to Shopify Plus, this process is simpler. Shopify Plus is best if you have large business with thousands of products to transfer. You can use Transporter App to migrate your products easily.
Getting all your business data in one place makes it easy to handle.
STEP 3: Get Your Redirects Ready :
Once you are done with building your store, now it’s time to build your redirects.
There are two key reasons to build a list of redirects while transferring your store to Shopify:
- It will ensure that any customer using an old URL ends up on the correct page of your new site after the transfer, so you don’t lose any revenue from people landing on dead pages.
- It will transfer any page authority that you’ve built for Google searches to the new URLs, helping your new store rank for search results and maintain your traffic from dropping after the switch.
Shopify have an easy way to add redirects to your new store. All the redirects will go live once your store is lunched.
Furthermore, there’s an option to import directs as a batch. Or you can add redirects within Shopify by going to Online Store > Navigation > URL Redirects. For every page there you will have to create a different URL.
Check URL path of every page and product you created in your new Shopify Store. If they are same as your old ones, you need to do nothing. Whereas, If they have a new URL path, create a redirect for them.
Should I redirect every URL from my old site?
Build list of redirects for the pages that have changed URLs in Shopify. For everything else, don’t build a redirect and allow the page to 404 once you transfer your website to Shopify.
STEP 4: Go Live :
Finally now it’s the time to make your website live.
You can buy a domain from Shopify directly which will set everything for you. But when transferring your website, you will already have a domain.
Therefore, you have to get your domain to point to Shopify so when people visit your website, they find your Shopify store. All you have to do is to log into your domain registrar and edit your DNS settings. You’ll be adding an A record and a CNAME.
Shopify has step-by-step instructions and the exact settings you need to configure here.
Make sure you’re completely ready to make the switch before doing this step because once you saved these DNS settings your domain will start pointing to Shopify.
If you want a cleaner cut between the two sides the most popular method is to do the switch during your lowest-traffic time. It’s usually in the middle of the night on a weekend. This causes the least disturbance and is standard practice these days.
What Happens If Something Goes Wrong?
Keep you old website active during the transfer. All URLs and the domain will point to your new website. But keep your old stuff on standby in case if something goes wrong.
There is a list of endless weird situations that can come up that could impact your business. Your backup plan should be to point your domain back to your old site. It will take a few hours for all the changes to reverse themselves but they will reverse.
Keep your old website for at least 30 days just to check if everything goes good.

STEP 5: Shutdown Your Old E-Commerce website :
Once you are satisfied with your new e-commerce website and everything is going smoothly, it’s time to shut down your old E-Commerce website.
If you skip this step this can cause a problem. This step is pretty easy. Once you cancel your subscription on your old ecommerce software, that company should turn everything off for you. Other than logging into your old account and hitting the cancel button, there shouldn’t be anything else that you have to do.
These were the simple steps to follow to move your website to Shopify
If need any help in migration Contact Us