12 Apr
When opening a new ecommerce store, Shopify is the best option to choose. It gives you control over almost everything. You can easily customize everything according to your brand’s requirements.
Also, to do so you don’t even require any expert, this can be easily handled by you too. But what really matters is balance: giving customers just enough originality that you stand out, but not so much that finding what they want becomes unfamiliar or unnatural.
Coming towards customization, let’s dig deeper into how to customize Shopify from a technical perspective.
1. Customizing themes
With Shopify you can have full control over every decision as you plan, create, and optimize. That level of control is attractive. Shopify Themes are the templates that merchants use on their ecommerce stores.
Once you choose a theme that defines the basic look and feel of your online store, you can customize the theme to suit your unique brand. You can customize your theme content and settings from your Shopify admin by using the theme editor. The theme editor includes a theme preview and a sidebar or edit menu that you can use to add and remove content, and to make changes to your settings.
Shopify and Shopify Plus makes it possible to customize everything that matters to today’s online shoppers. Automating full-scale campaigns, creating personalized buyer journeys, offering intuitive payments, and direct social selling.
2. Customizing products
Your products are the goods, digital downloads, services, and gift cards that you sell. You add a product in Shopify by entering product details and uploading product images. If your product has options, like size or color, then you can add a variant for each combination of options.
When you are adding or updating a product, you can make the product available to one or more of your sales channels. You view, add, update, and organize all of your products and variants from the Products page in the Shopify admin.
Shopify provides many options with the help of that you can easily customize products. Customizing your products is about striking a balance between the frontend for customers and the backend for your team. Displaying your products beautifully is not the only thing, you also have to make them easy to purchase, update, add, remove, manage, and list across multiple sales channels.
Moreover, Shopify provides many options with the help of that you can easily customise it. Instead of paying a significant amount or recurring amount to the app, they can have the same customisation by putting some javascript, HTML tags, and liquid codes as a Shopify developer or Shopify expert.
You don’t need to have any coding knowledge to add a product, change copy, update images, load a video, or even optimize details like pricing, shipping, and SEO. For streamlined management, Shopify’s RESTful API integrates directly with your existing OMS, PIM, 3PL, and CRM. The same API access can also be used to bulk upload or update your products.
As for customization, three points deserve special attention:
Multi-channel sales: Once you’ve set up your products, Shopify’s native integration means you can automatically push individual products or entire collections to over 20 different channels. Most notably: POS for physical sales, social networks like Facebook, Pinterest, and Instagram, chat platforms for conversational commerce, mobile apps, and wholesale.
Variants: For brands with deeply customizable products, Shopify’s 100 variant limit is often seen as a black mark. Complete code control over the backend removes such limitations or so the argument goes. In truth, very few merchants bump up against the 100 variant limit.
Metafields. Instead of creating multiple templates to accommodate unique data or design elements, metafields let you customize products, collections, blog posts, and even entire pages.
More advanced usage particularly with the ShopifyFD tool extends to product videos, hover features, affiliate links, and any other custom adaptations you’d like to make.
3. Customizing discounts

When it comes to acquiring new customers, retaining and rewarding the ones you already have, and maximizing average order value, price is a powerful leverage point. Unfortunately, optimizing discounts at scale can be a challenge for brands using the wrong discount can reduce profits and also devalue your brand.
For example, you have tens of thousands of products for sale on your site, offering discounts to customers who buy in bulk, but having to manually add each discount you want to offer because you can’t automate the process. Automating and customizing discounts on Shopify comes down to three options.
1. Discount codes
Naturally, you can create discount codes for customers to enter manually at checkout. These codes can be applied to specific products, collections, customers, or universally.
2. Price discounts
Much like codes, price discounts are manual creations you can use to mark down products or collections. The result is a comparable price that shows off savings in the form of dollar amounts, percentages, or both.
3. Custom Scripts
Shopify Scripts go beyond the first two options and allow you to create custom code to apply a variety of buying incentives automatically:
- Percentage (%) or amount ($) off products
- Tiered pricing for volume
- Free shipping thresholds
- Buy one get one (BOGO)
- Discounts based on past purchase behavior
Scripts remove the need for manual coupon codes and one-size-fits-all price discounts.
4. Customizing checkouts
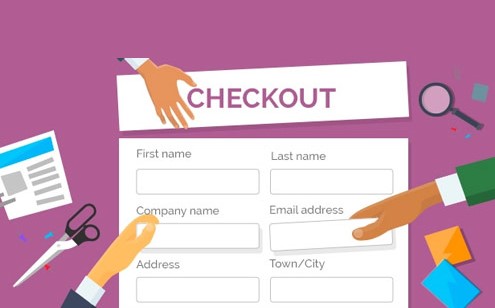
Shopify Plus merchants can completely customize their checkouts through the checkout.liquid file. Unlike a site’s overall theme, checkout.liquid is self-contained and doesn’t render any additional template files. This means you can duplicate the same styling as your site itself while simultaneously editing the code that controls the checkout process directly.
Also, customers can trust and be confident that their personal and payment information is safe. For merchants on Shopify Plus, the checkout process is rendered by the checkout.liquid file. Unlike theme.liquid, checkout.liquid is self-contained and does not render any additional template files. The checkout process includes the following steps:
1. Inventory issues
This is displayed if one or more of the cart items is out of stock, or the inventory level is below what the customer has requested. Customers are shown a confirmation button that will update their cart with the available item quantities.
2. Customer information
The customer enters their email address and will have the option to log in if customer accounts are enabled for the store. If any cart items require shipping, the customer will be shown a shipping address form. Otherwise, the customer is shown a billing address form.
3. Shipping method
The customer selects a shipping option or edits shipping info. This step is skipped when none of the cart items require shipping. Skipping the shipping method is common for merchants selling digital products or services. Clicking Edit shipping information returns the visitor to the Customer information step.
4. Payment method
The customer chooses a payment method and, if applicable, enters payment information. Some payment providers require the customer to complete payment information on a different site. Customers can also specify a different billing address during this step.
5. Review order
Optional based on checkout settings. The customer confirms their order total, shipping and billing addresses, and payment details by clicking Complete order.
6. Processing/forwarding
A temporary page shown to customers as their order is being processed, or as they are being redirected to an off-site payment provider. The message displayed during this step depends on your checkout’s translation settings.
7. Order status
The last step of checkout, displayed after an order is complete.
Customizing the style of your checkout
If you sell your products using an online store, then you can customize the style of your checkout pages in the theme editor. Add your company logo, change the colors, or choose a new font to make the checkout match your business.
Although you might want to add a lot of color and interest to your checkout pages, it’s best to keep the design simple. Your customers use these pages to enter shipping and payment information for their orders, and you don’t want to distract them or make the information hard to read. Choose colors with high contrast, and images that don’t draw attention from the words on the page.
NOTE: The checkout.liquid layout is available to Shopify Plus merchants only. To enable or disable checkout.liquid, Shopify Plus merchants must contact support. If your store isn’t on Shopify Plus, then you can customize your checkout pages in the theme editor.
5. Customizing payments
Understanding the payment process is an important step toward getting paid by your customers. When a customer checks out, they can choose to pay for their order using any of the methods that you’ve enabled in the Payment providers area of your Shopify admin. You can enable a variety of payment methods using Shopify.
There are a few different things to consider when you’re choosing which payment methods to offer. If you want to let your customers pay using a credit card, then you can use Shopify Payments or a third-party provider.
Although accepting payments are the final step in checkout, they deserve special attention on the customization front for at least two reasons:
Personalizing payment options
Shopify offers over a hundred different payment gateways based on your and your customer’s location. This includes Shop Pay, which allows you to accept cards online or off without any third-party setup as well as a host of third-party gateways built directly into our Level 1 PCI compliant checkout. Plus, if your preferred gateway doesn’t yet exist, Shopify’s hosted payment SDK can integrate it.
Of course, options are great, but too many choices can lower conversion rates. In this sense, less is almost always more. That’s why the Shopify Script Editor lets you create a smart checkout experience to show, hide, or rename payment methods based on select products, customer groups or tags, or a customer’s shipping address.
Mobile payments
Fewer clicks equal more sales. In addition to integrating with other mobile-friendly gateways like Apple, Shop Pay’s new one-field confirmation takes ease to a whole new level. Together, Shopify’s Script Editor, mobile-payment options, and native sales channels on Facebook, Pinterest, and Instagram, combine to add the final touch of customization to your online funnel.
Final thoughts
Grow your business with the world’s most flexible platform Shopify. Shopify and Shopify Plus lets you customize your theme, products, discounts, checkouts, or payments and make your store stand out of all. Additionally, Shopify Plus puts control back in the hands of brands without forcing you to sacrifice speed, agility, or deep customization.